
Runner Sets and their Properties can be accessed from a number of areas but the functionality is different.
 Watch the Video on how to add and edit runner sets - which will be discussed in the following tutorial.
This tutorial will not only discuss how to create and apply a Runner Set to your current drawing but also how easy it is to change the defaults and individual cabinet runners.
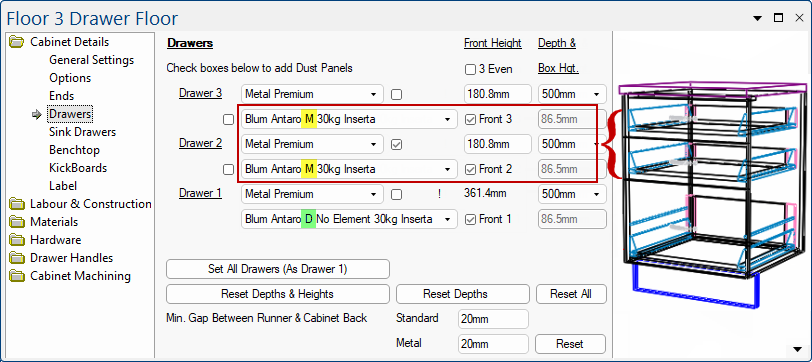
We will look at a Floor 3 Drawer cabinet which has Inserta M set for the top drawers and Inserta D set for the bottom drawer.
As the cabinet is reformatted and the available drawer space changes, the appropriate runner will automatically be selected.
Notes on Available Drawer Space
Calculated as 'Front Height' minus Bottom Drawer Overlap (if applicable) minus Top Gap plus Top/Rail Thickness (if applicable)
- Example: With a top drawer front at 162, the space for the Top Drawer is 162 - 16 - (20+16) = 110
- As it is the top drawer, it does not include the gap beneath the drawer.
The height is the available space in the cabinet, not the drawer front height.
- The available space is the drawer front minus any required gap below the drawer box minus any required gap above the drawer box.
- Note that if it is the top drawer, a rail will interfere with it.

On the Hardware > Drawers page of the Drawing properties we can see that...
The drop list shown does not have a Blum - Antaro Screw, so we will create one by clicking on the applicable Edit button.
This will open the $$Properties$ for the Metal Premium Runners, as shown below.
You will now be back to the Metal Premium Runners Properties and the new series Blum - Antaro Screw still needs to be set up.
Select the Folder e.g. Blum, and as the list of files is very long, we will Filter these by everything that has 30kg Screw included in the name.
On the image above, you can see that there are Height edit boxes, which sets the height automatically dependent on the 'Based on Front Height Only' option.
In this example, we will leave the 'Based On Front Height Only' unticked (default) and...
Image and Logo images are normally provided in the smz file that is downloaded via StoreMaster, however you can use the $$drop list$$ (shown above) to manually add/change images. Ensure that you click the Save button before closing this $$property inspector$$ if changes are made.
These are displayed on the Hardware > Drawers page of the $$Catalog/Drawing Properties:drawing$$.
To locate $$CabMasterPro$$ folders, refer to the My Setup > Misc Setup page, where buttons are provided for your convenience.
Now you can see that the $$Properties$$ for the Metal Premium Runners has all the heights and runners specified, using Blum Antaro 30kg Screw.
This will bring you back to the Hardware > Drawers page and the default Entry will be automatically updated, as shown.
Now go back to your placed Floor 3 Drawer cabinet, which was set to use Blum Antaro 30kg Inserta.
As you can see, the Cabinet Details > Drawers page has updated to use our newly created Blum Antaro 30kg Screw runners.
Available Space: If you change the Front Height on the cabinet, you will see that the runners will automatically update - click above image to view example.
Remember the 'Based on Front Height Only' on/off option determines what the Front Height is based on.
In Tutorial 1 we created a temporary Metal Premium Runner Set called 'Blum - Antaro Screw (TEMP)' and now we will delete it.
The easiest way to do this is by accessing the applicable Runner Set from the Hardware > Managers page.

The messages require you to confirm removal, as this cannot be undone.
Click OK to 'removed' message.

Notes on the location of subfolders
Each runner group has a subfolder in the ...Table\ folder, these subfolders are ...
- DrawerRunners - Standard RunnerSet1 (includes Basket and Bins RunnerSet4)
- DrawerMetalBox - Metal Standard RunnerSet2
- DrawerTandemBox - Metal Premium RunnerSet3 (includes Corner RunnerSet5)
For a full discussion, see Drawer Runner Groups Explained.
Within the subfolder are the runner files (one for each runner type), which in this case is also within a subfolder.
Defaults for Runner Sets can be set on the Hardware > Drawers page in the $$Drawing$$ Properties and is used on opening a new job/drawing.
These are reflected on the Hardware > Drawers page at $$Cabinet level. You can override the defaults set in the Drawing$$ Properties - see the topic on Filters for examples.